Written by Rajeev Piyare, Founder of Conexio Technologies
Preface
Developing applications for the Internet of Things (IoT) is no easy feat. Connecting things to the cloud infrastructure involves the integration of a disparate mix of technologies, such as IoT endpoints, back-end systems, data sources, and other platforms.
Businesses that aim to build IoT applications and products need developers and engineers with specialized skills that enable them to configure and maintain these technologies regularly. This slows the businesses in getting their applications into production due to bottleneck with IT and their project backlog.
With the emergence of low-code or no-code platforms, many challenges in the IoT application development process are now being eliminated, enabling companies to drive better results.
What are Low-code or No-code Development Platforms?
Simply, low-code/no-code platforms are app development tools that enable non-software engineers to build software applications, usually by means of dragging-and-dropping icons or widgets and connecting them in a graphical user interface to acquire and visualize data streams.
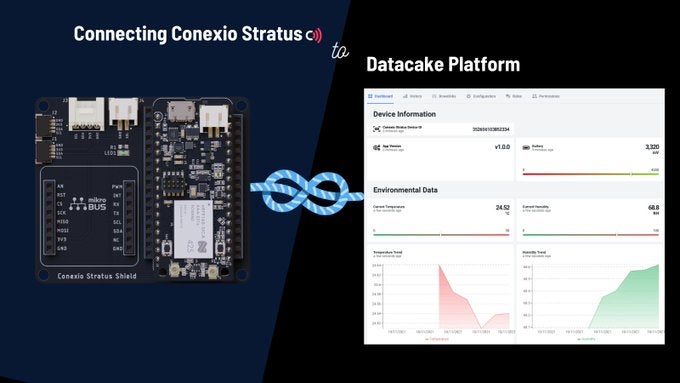
One such platform that we love is Datacake: a multi-purpose, low-code IoT platform that requires zero programming skills and minimal time to build custom IoT applications. Datacake allows users to connect their physical end devices over MQTT protocol along with others to record measurements. Currently, Datacake offers connecting the first two devices for free which includes full access to the platform features and unlimited workspaces. This is great news for IoT enthusiasts who like to develop and test their applications without having to worry about paying for cloud services or platform plans.
To assist with edge computing, this is where the Conexio Stratus cellular IoT device comes in. Conexio Stratus kit comes with out-of-the-box cellular data of 500MB and 250 SMS valid for 10 years. This enables users to connect their IoT projects to platforms like Datacake accelerating their product development process.
This tutorial…
Covers how to create your first device on Datacake and connect the Conexio Stratus running Zephyr RTOS to the Datacake platform via MQTT broker. MQTT is a lightweight publish/subscribe messaging protocol designed for low-bandwidth IoT devices.
Furthermore, the sample application used for this tutorial also demonstrates how to fetch the important Conexio Stratus device vitals such as the battery voltage, LTE signal strength, firmware version, device IMEI, and the environmental data.
Required Toolchains
This tutorial assumes that one has already installed and set up the nRF Connect SDK v1.7.0 or later, the main toolchain required for building and compiling applications for the Stratus device. If not, please refer to this tutorial for getting up and running with the Stratus platform. So let’s dive in.
Registration and Device setup on the Datacake Cloud
Register and create a user account on the Datacake platform here. Your first two devices are free.
Before any measurement readings can be stored via MQTT, we will need to set up a device on the Datacake platform. After registration and account activation, head over to the fleet view of your Datacake workspace.
Click Add Device in the upper right corner which will bring up the following pop-up window.

Registration and Device setup on the Datacake Cloud
Register and create a user account on the Datacake platform here. Your first two devices are free.
Before any measurement readings can be stored via MQTT, we will need to set up a device on the Datacake platform. After registration and account activation, head over to the fleet view of your Datacake workspace.

Fig.1
Click Add Device in the upper right corner which will bring up the following pop-up window.
Fig.2
In STEP 1, select the device type as “API”, and under Datacake Product choose New Product. Then assign a name to your device under “Product Name”. For this tutorial, we named our product to be “Conexio Stratus”.

Fig.3
In STEP 2, you can add one or more API devices. Next, assign the device name and hit Next.
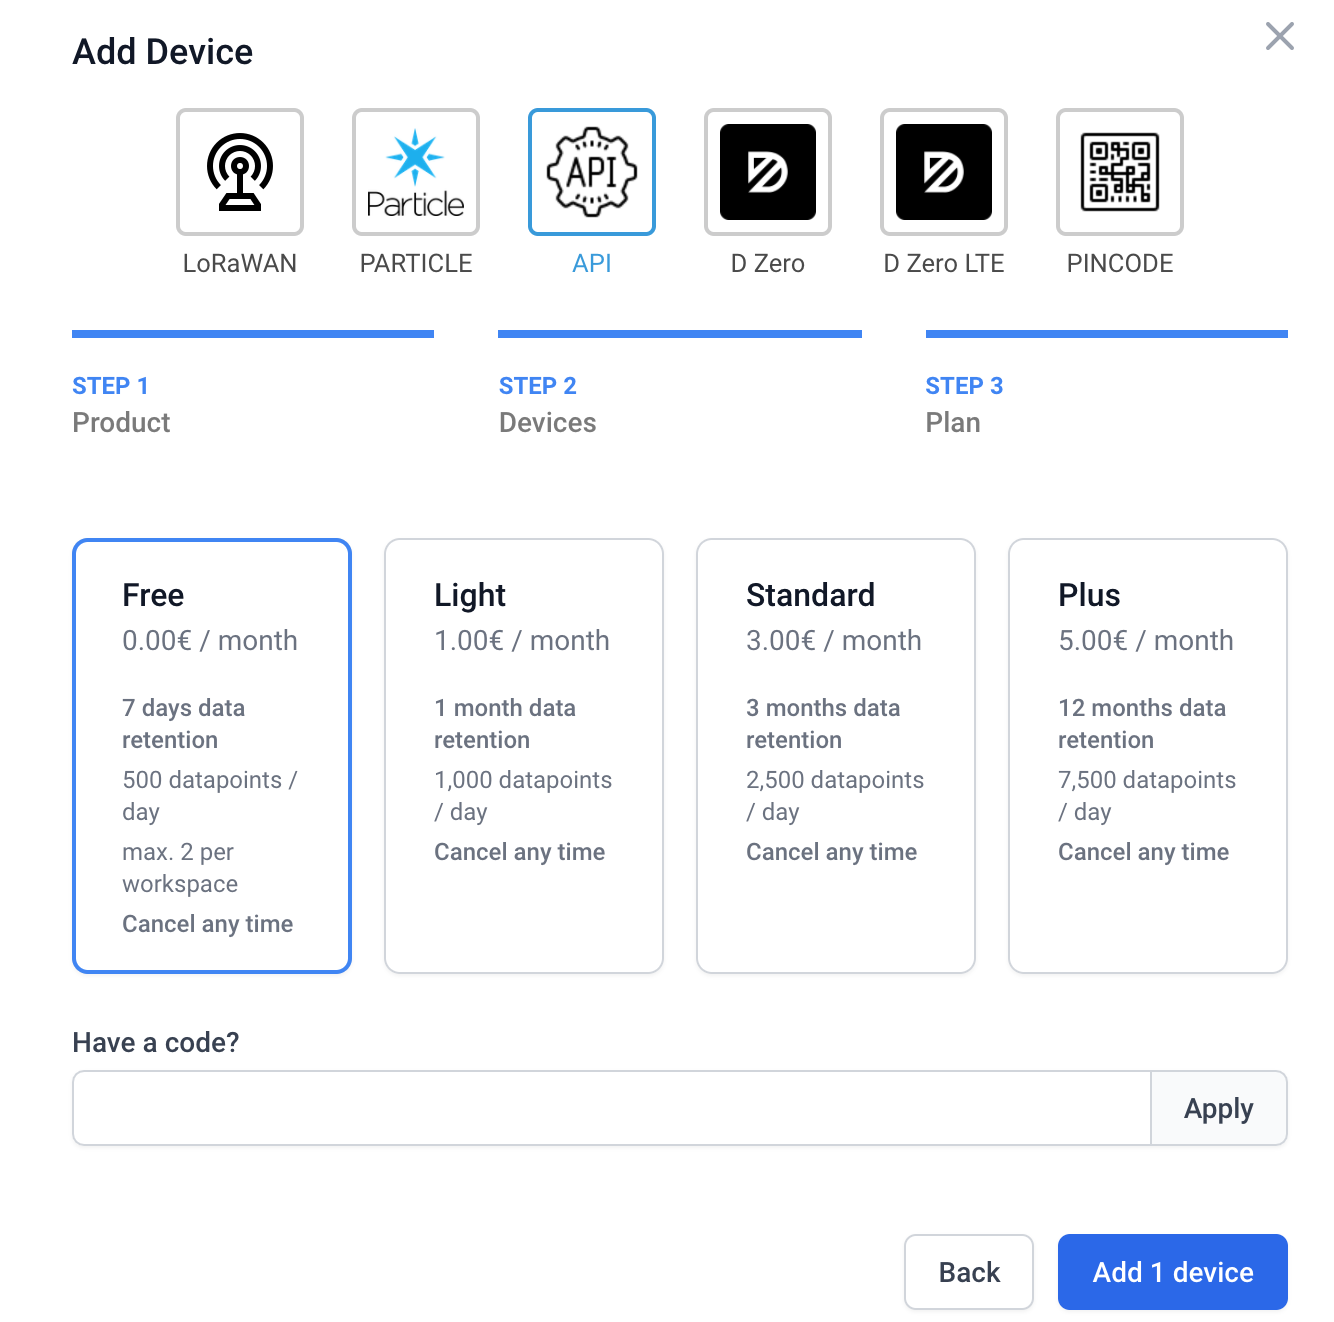
Fig.4
Finally, in STEP 3, choose the Datacake plan. To create a device it is necessary to choose a payment plan. Since Datacake allows you to create up to two devices for free, you can choose the “Free” plan and click “Add 1 device”.
Hooray! Your device has now been registered to the Datacake platform and should appear under devices in the “Fleet” view. Click on your registered device and it will take you to its workspace.
Adding Database Fields
All right. At this point, we need to define fields in the database of the device, which will host the measured values that are sent from the Stratus device via MQTT. You can read more about the Datacake fields and types here.

Fig.5
In the Datacake, navigate to the “Configuration” tab and scroll down to the Fields section and click the “Add Field” button.

Fig.6
This will open a modal with a variety of data types. For this tutorial, we will add multiple fields starting with the temperature of type “Float”. The Datacake will automatically fill in the “identifier” field. See the snippet below for details.

Fig.7
Once the field details are complete, click “Add Field” and you’re done with this field. Below you will see all the different fields we have added for this sample application. These fields include:
- RSRP – the LTE signal strength value
- Battery – for recording the voltage of the connected LiPo battery
- IMEI – the Conexio Stratus International Mobile Equipment Identity (IMEI) number
- Version – firmware version running on the device
- Temperature – environmental temperature readings from the SHT40 sensor
- Humidity – relative humidity readings from the SHT40 sensor

Fig.8
Adding Integrations
Next, just below the Fields section, you will find the Integrations section. For forwarding data from your devices via MQTT, a connection to Datacake must be established. Click Configure and the MQTT Integration information window will pop up.

Fig.9
The Datacake platform offers an MQTT broker with TLS encryption, which allows both subscription and recording of data.
With the help of this broker you can:
- Forward incoming device data to external services via MQTT
- Store data via MQTT into the Datacake Cloud
For recording measurements into the Datacake Cloud, we will publish the data to the respective topic structure as shown in the MQTT Integration window.

Fig.10
Note: Copy the above broker name and the topic which we will use later in our firmware configuration.
The MQTT topic prefix for Datacake follows the following structure:
| dtck-pub/<product_slug>/<device_id>/<field_name> |
Head over to Datacake’s MQTT documentation to read more about this structure. The last element in the topic structure is the field name of the measured value, as it appears in the database field that we created earlier above. The field (identifier) is where we will publish different measurements from the Stratus device.
Generate Access Token
When a user account is created and registered in the Datacake platform, a user access token is automatically generated. This API token acts as security and gives devices access to the user’s account.
Note: We will need this token to authenticate our Stratus device with the Datacake platform.
To view your personal access token, click “Edit Profile” and then “API”.

Fig.11

Fig.12
To view your access token, click “Show”. Now copy this access token in a safe place as we will need it later.
At this point, we have all the required details to connect and publish data from our Conexio Stratus device to the Datacake. Let’s now head over to the device firmware side.
MQTT Application Code
We have extended the sample MQTT application provided in the nRF Connect SDK to easily connect the Stratus kit to the MQTT broker, send, and receive data from the Datacake platform.
The extended sample application connects to the Datacake and publishes the data to the configured publish topic. On a button press event, the application publishes the device vitals to the Datacake and periodically publishes the environmental data such as temperature and humidity.
The full application can be found in the conexio-stratus-firmware repo on GitHub.
Add Datacake credentials to the Application Code
First, we will have to add the Datacake access token to the application code. You will need to edit conexio_stratus_firmware/samples/datacake/prj.conf with your Datacake access token. Update the following parameters.
Note for Datacake the user name and password are the same.
| # MQTT application configuration authentication CONFIG_MQTT_PASS=“DATACAKE_ACCESS_TOKEN” CONFIG_MQTT_USER=“DATACAKE_ACCESS_TOKEN” |
MQTT Broker Configuration
Next, we need to configure the MQTT broker hostname and the port. Update the Datacake broker configuration with the following:
| # MQTT broker configuration CONFIG_MQTT_BROKER_HOSTNAME=”mqtt.datacake.co” CONFIG_MQTT_BROKER_PORT=8883 |
We will be using Port 8883 that uses a CA-signed server certificate.
MQTT Pub/Sub Configuration
To record the measurements to a specific Database Field of a Device, we will update the MQTT publish topics as follows:
| # MQTT topics for recording measurement values # Change this as per your Datacake MQTT Integration and fields CONFIG_MQTT_PUB_TOPIC_TEMP=“dtck-pub/<product_slug>/<device_id>/TEMPERATURE” CONFIG_MQTT_PUB_TOPIC_HUM=“dtck-pub/<product_slug>/<device_id>/HUMIDITY” CONFIG_MQTT_PUB_TOPIC_VER=“dtck-pub/<product_slug>/<device_id>/VERSION” CONFIG_MQTT_PUB_TOPIC_IMEI=“dtck-pub/<product_slug>/<device_id>/IMEI” CONFIG_MQTT_PUB_TOPIC_BAT=“dtck-pub/<product_slug>/<device_id>/BATTERY” CONFIG_MQTT_PUB_TOPIC_RSRP=“dtck-pub/<product_slug>/<device_id>/RSRP” CONFIG_MQTT_PUB_TOPIC_BUTTON=“dtck-pub/<product_slug>/<device_id>/BUTTON” # MQTT subscription topics CONFIG_MQTT_SUB_TOPIC=“dtck/conexio-stratus/<product_slug>/<device_id>/+” |
For instance, with the Product-Slug my-product, the Device-ID 6b98a3bb-9ae1-418f-9375-f23091a849cd, and the Field-Identifier TEMPERATURE, will publish a message to:
| dtck-pub/my-product/6b98a3bb-9ae1-418f-9375-f23091a849cd/TEMPERATURE |
The payload will hold the value which you want to be recorded into that specific database-Field.
| publish(“dtck-pub/my-product/6b98a3bb-9ae1-418f-9375-f23091a849cd/TEMPERATURE”, 25.00) |
Now we are all set in terms of the MQTT parameter configurations.
Building and Flashing the application
To compile the application, open a terminal window in the application directory and issue the following west command
| west build -b conexio_stratus_ns |
In case, you do not want to recall the west commands every time, we have also included a python script (generate_firmware.py) to generate the Stratus device firmware. Simply command the following in the terminal and it will take care of the rest.
| python3 ./generate_firmware.py |
Once the application is compiled successfully, connect the Stratus device and put it into the DFU mode.
Flash the compiled firmware using newtmgr:
| newtmgr -c serial image upload build/zephyr/app_update.bin |
Open up a serial console and reset the Stratus device. The following serial UART output will be displayed in the terminal. If you are connecting your Stratus device for the first time, give it a few minutes to register to the network and establish the LTE connection with the tower. No extra SIM activations are required as the Stratus device comes preconfigured for automatically connecting to the LTE network.
| [2021-11-21 16:31:38] *** Booting Zephyr OS build v2.6.99-ncs1 *** [2021-11-21 16:31:39] [00:00:00.213,592] <inf> mqtt_app: Stratus MQTT Datacake sample started, version: v1.0.0 [2021-11-21 16:31:39] [00:00:00.213,623] <inf> watchdog: Watchdog timeout installed. Timeout: 60000 [2021-11-21 16:31:39] [00:00:00.213,653] <inf> watchdog: Watchdog started [2021-11-21 16:31:39] [00:00:00.213,653] <dbg> watchdog.watchdog_feed_enable: Watchdog feed enabled. Timeout: 30000 [2021-11-21 16:31:39] [00:00:00.213,684] <inf> mqtt_app: Provisioning certificates [2021-11-21 16:31:39] [00:00:00.398,468] <inf> mqtt_app: Disabling PSM and eDRX [2021-11-21 16:31:39] [00:00:00.399,353] <inf> mqtt_app: LTE Link Connecting… [2021-11-21 16:31:40] +CEREG: 2,”412D”,”03382810″,7 [2021-11-21 16:31:40] +CSCON: 1 [2021-11-21 16:31:41] +CEREG: 5,”412D”,”03382810″,7,,,”11100000″,”11100000″ [2021-11-21 16:31:41] %CESQ: 35,1,10,1 [2021-11-21 16:31:42] [00:00:03.091,156] <inf> mqtt_app: LTE Link Connected! [2021-11-21 16:31:42] [00:00:03.123,840] <dbg> mqtt_app.modem_rsrp_handler: Incoming RSRP status message, RSRP value is 35 [2021-11-21 16:31:42] [00:00:03.368,347] <inf> mqtt_app: IPv4 Address found 144.126.245.197 [2021-11-21 16:31:42] [00:00:03.369,140] <inf> mqtt_app: client_id: 352656103852334 [2021-11-21 16:31:42] [2021-11-21 16:31:42] [00:00:03.369,140] <inf> mqtt_app: TLS enabled [2021-11-21 16:31:42] [00:00:03.369,201] <inf> env_sensors: Environmental sensors initialized [2021-11-21 16:31:46] [00:00:06.870,300] <inf> mqtt_app: MQTT client connected [2021-11-21 16:31:46] [00:00:06.870,330] <inf> mqtt_app: Subscribing to: dtck/conexio-stratus/4fbfe839-c8aa-4882-a890-02f981753f6d/+ len 59 [2021-11-21 16:31:46] [00:00:07.249,328] <inf> mqtt_app: SUBACK packet id: 1234 [2021-11-21 16:31:47] [00:00:08.378,997] <inf> mqtt_app: Publishing: 26.06 [2021-11-21 16:31:47] [00:00:08.379,028] <inf> mqtt_app: to topic: dtck-pub/conexio-stratus/4fbfe839-c8aa-4882-a890-02f981753f6d/TEMPERATURE len: 73 [2021-11-21 16:31:47] [00:00:08.388,702] <inf> mqtt_app: Publishing: 23.24 [2021-11-21 16:31:47] [00:00:08.388,702] <inf> mqtt_app: to topic: dtck-pub/conexio-stratus/4fbfe839-c8aa-4882-a890-02f981753f6d/HUMIDITY len: 70 [2021-11-21 16:31:47] [00:00:08.910,614] <inf> mqtt_app: PUBACK packet id: 43056 [2021-11-21 16:31:47] [00:00:09.183,288] <inf> mqtt_app: PUBACK packet id: 62515 [2021-11-21 16:31:47] [00:00:09.205,596] <inf> mqtt_app: MQTT PUBLISH result=0 len=5 [2021-11-21 16:31:47] [00:00:09.206,390] <inf> mqtt_app: Received: 26.06 [2021-11-21 16:31:47] [00:00:09.252,532] <inf> mqtt_app: MQTT PUBLISH result=0 len=5 [2021-11-21 16:31:47] [00:00:09.253,234] <inf> mqtt_app: Received: 23.24 [2021-11-21 16:31:56] +CSCON: 0 [2021-11-21 16:31:56] %CESQ: 32,1,1,0 [2021-11-21 16:31:56] +CEREG: 5,”412D”,”03392510″,7,,,”11100000″,”11100000″ [2021-11-21 16:31:57] [00:00:18.281,677] <dbg> mqtt_app.modem_rsrp_handler: Incoming RSRP status message, RSRP value is 32 [2021-11-21 16:32:01] +CSCON: 1 |
Once the LTE connection is established, you will notice that the Stratus connects to the Datacake MQTT broker after which it publishes the sensor data to the configured topics. Your Stratus device is now ALIVE and communicating to the Datacake cloud 🎉.
Visualize Data on Datacake Dashboard
Head back to the Datacake dashboard and add graphical widgets to your workspace.
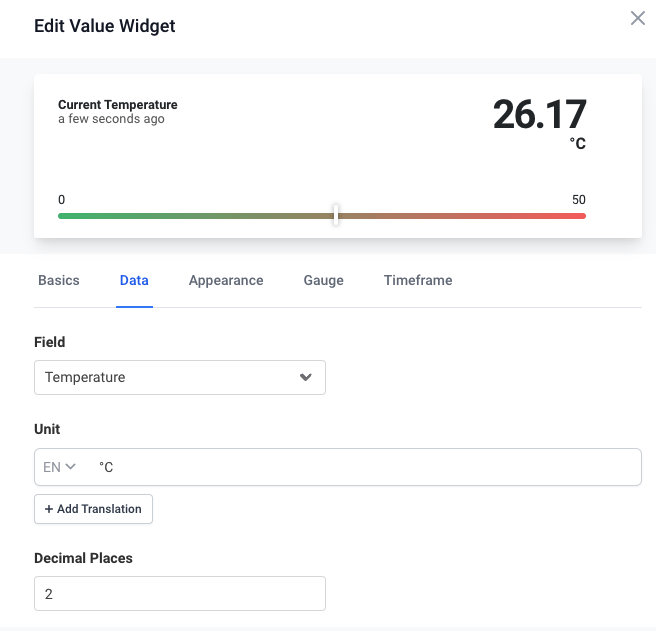
Fig.13
You will now see the device data flowing into the Datacake and beautiful graphs being populated. Below is the sample dashboard that we have created. Fast and Simple!

Fig.14
Conclusion
This post demonstrates one of the many applications that you can create with the Conexio Stratus cellular IoT device. Now that we have no-code or low-code cloud platforms like Datacake, sending and visualizing IoT device data has become much easier than before. The full application can be found in the conexio-stratus-firmware repo on GitHub.
If you want to create and connect your own IoT applications without having to worry about cellular data or contracts, grab your own Conexio Stratus kit today.

Fig.15
For further questions regarding Conexio Stratus or this tutorial, you can join our Conexio Discord Channel.
If you have any questions or comments in general, please feel free to reach out on the Zephyr Discord Channel.
Thank you!