This tutorial originally ran on the PlatformIO docs website. You can find it here. For more content like this, click here.
The goal of this tutorial is to demonstrate how simple it is to use VSCode to develop, run and debug a simple Bluetooth project using Zephyr framework for the Nordic nRF52-DK board.
- Level: Intermediate
- Platforms: Windows, Mac OS X, Linux
Requirements:
- Downloaded and installed VSCode
- Install drivers for J-LINK debug tool
- Nordic nRF52-DK development board
Contents
- Setting Up the Project
- Adding Code to the Generated Project
- Compiling and Uploading the Firmware
- Debugging the Firmware
- Writing Unit Tests
- Project Inspection
- Conclusion
Setting Up the Project
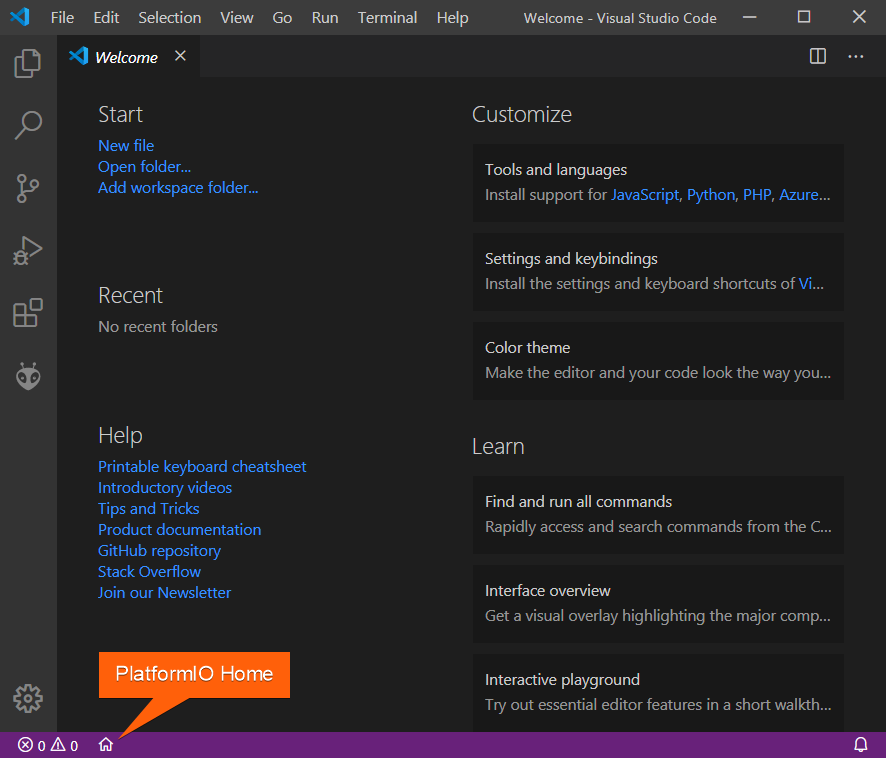
- Click on “PlatformIO Home” button on the bottom PlatformIO Toolbar:
- Click on “New Project”, select
Nordic nRF52-DKas the development board, Zephyr as the framework and a path to the project location (or use the default one):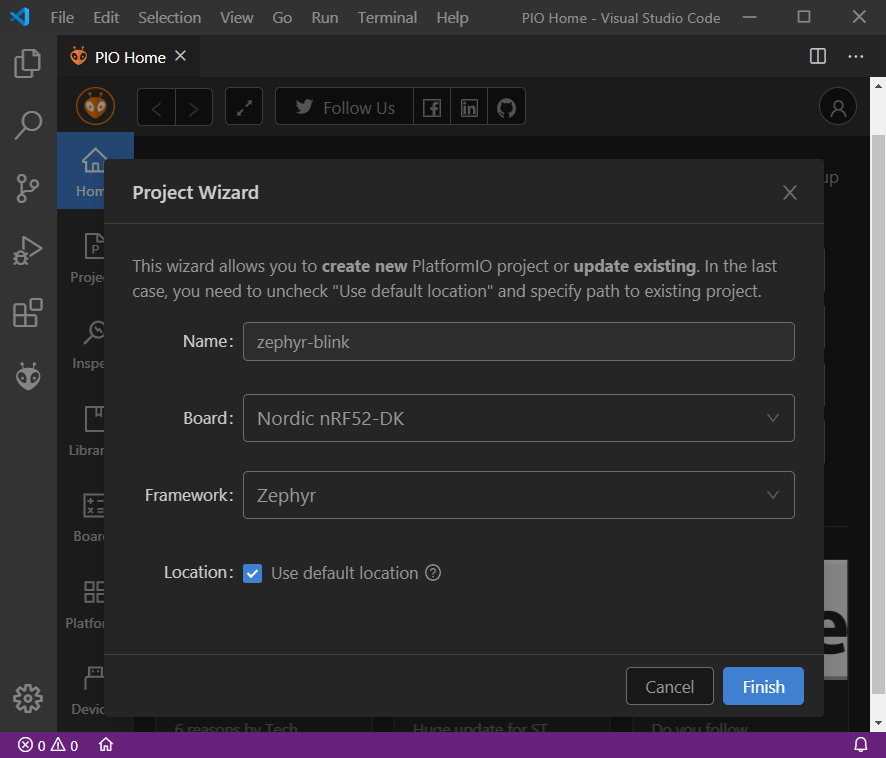
Adding Code to the Generated Project
- Create a new file
main.cin src_dir folder and add the following code:


2. By default Bluetooth feature is disabled, we can enable it by creating a new file prj.conf in zephyr folder and adding the following lines:

Compiling and Uploading the Firmware
- To compile the project use one of the following options:
- Build option from the
Project Tasksmenu - Build button in PlatformIO Toolbar
- Task Menu
Tasks: Run Task... > PlatformIO: Buildor in PlatformIO Toolbar - Command Palette
View: Command Palette > PlatformIO: Build - Hotkeys
cmd-alt-b / ctrl-alt-b:
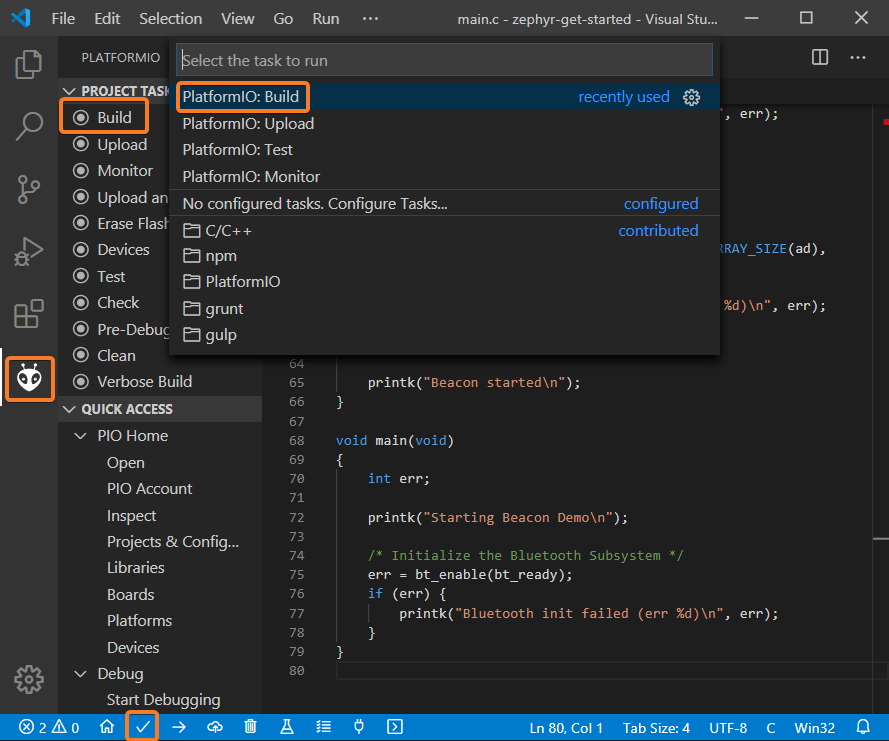
- Build option from the
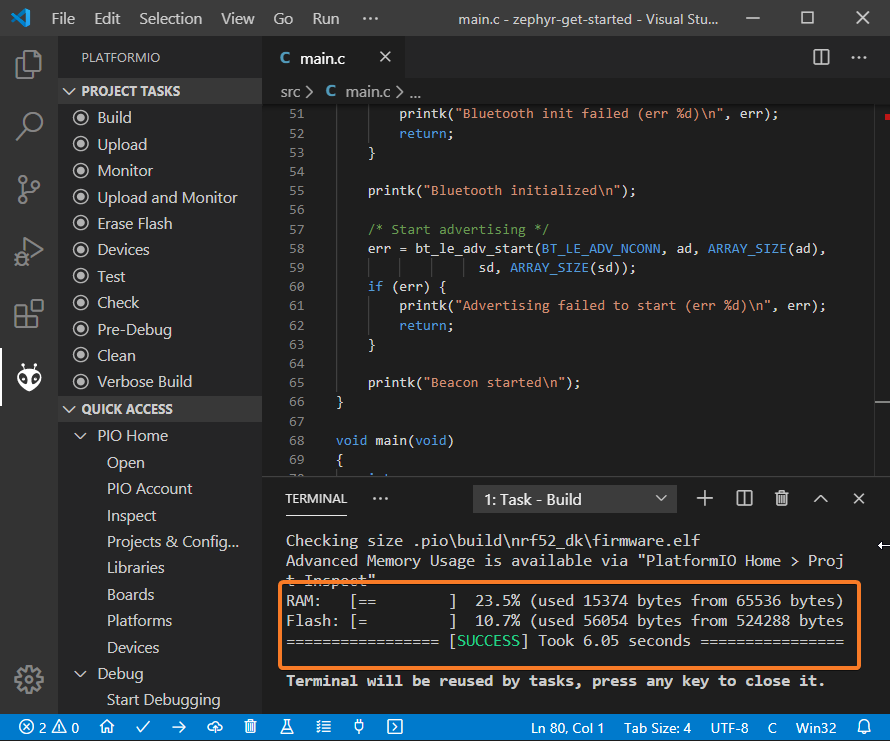
- If everything went well, we should see a successful result message in the terminal window:
- To upload the firmware to the board we can use the following options:
- Upload option from the
Project Tasksmenu - Upload button in PlatformIO Toolbar
- Command Palette
View: Command Palette > PlatformIO: Upload - Task Menu
Tasks: Run Task... > PlatformIO: Upload - Hotkeys
cmd-alt-u / ctrl-alt-u:
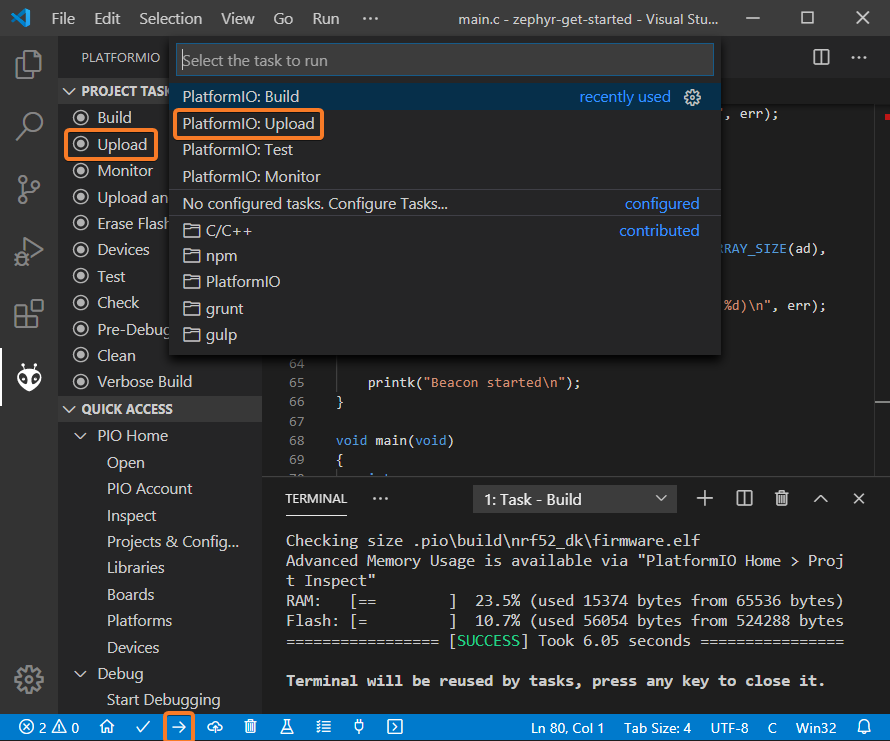
- Upload option from the
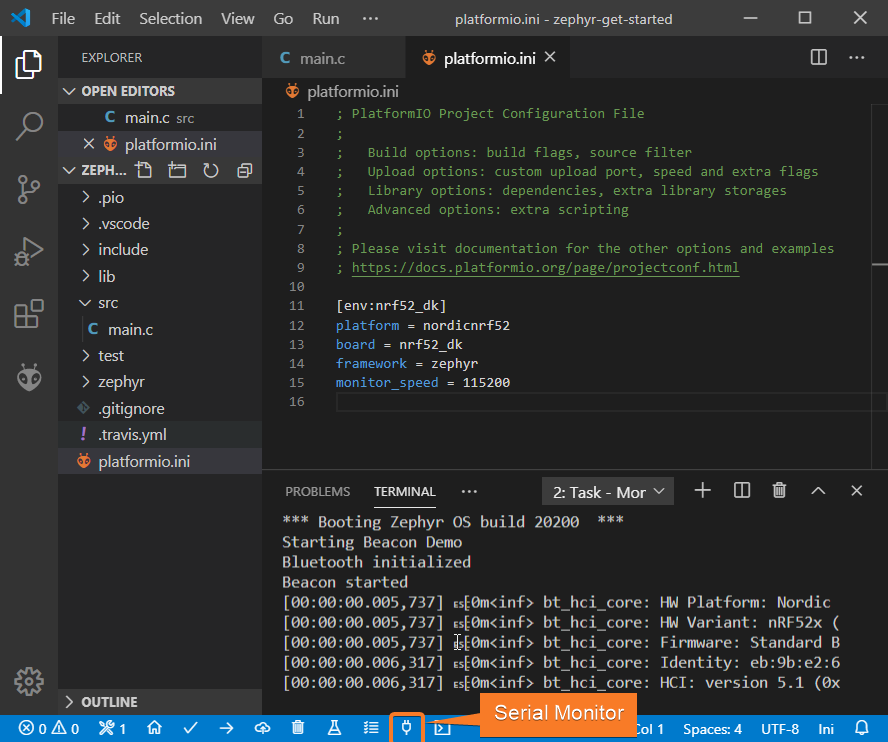
- Connect the board to your computer and update the default monitor speed to
115200inplatformio.inifile:[env:hifive1-revb] platform = sifive board = hifive1-revb framework = zephyr monitor_speed = 115200 - Open Serial Monitor to observe the output from the board:
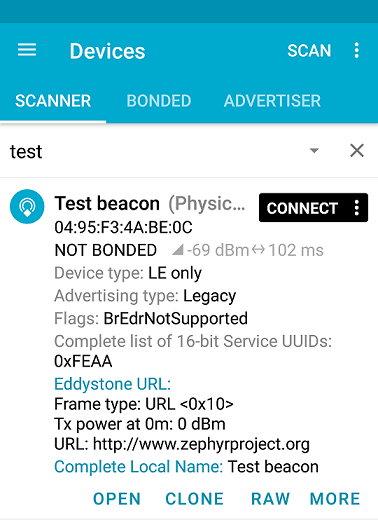
- If everything went well, the board should be visible as a beacon:
Debugging the Firmware
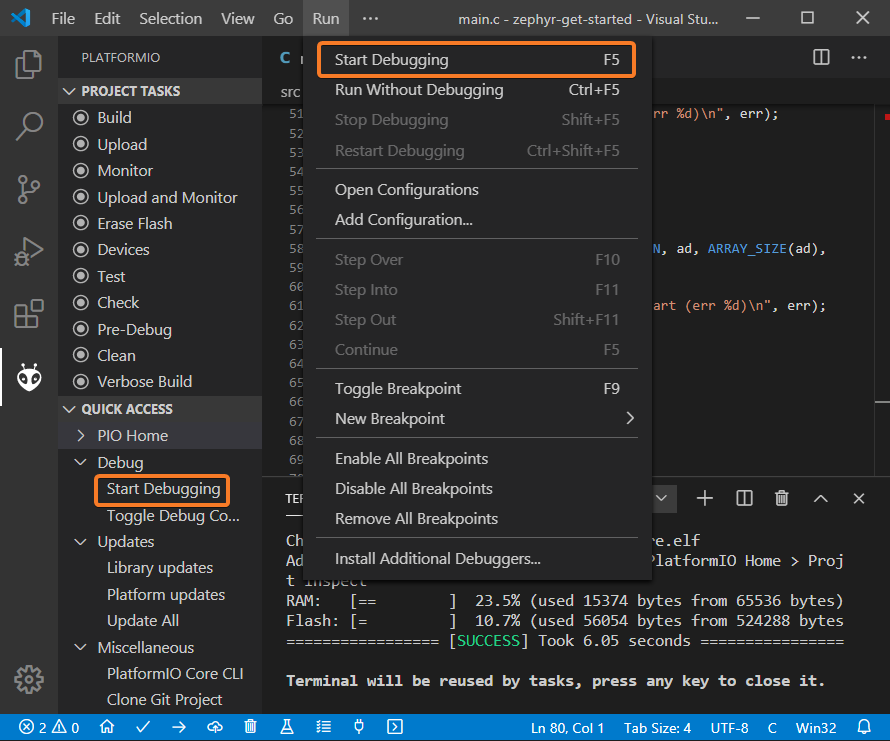
Since Nordic nRF52-DK includes an onboard debug probe we can use PIO Unified Debugger without any configuration.
- To start a debug session we can use the following options:
Debug: Start debuggingfrom the top menuStart Debuggingoption from Quick Access menu- Hotkey button
F5:
- We can walk through the code using control buttons, set breakpoints, add variables to
Watch window: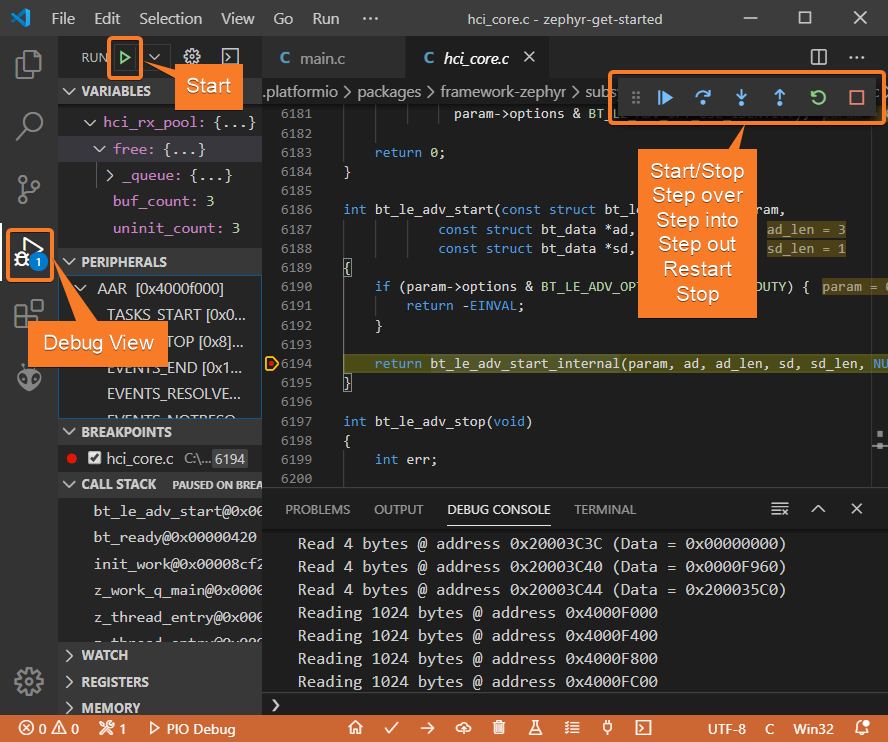
Writing Unit Tests
Note
Functions setUp and tearDown are used to initialize and finalize test conditions. Implementations of these functions are not required for running tests but if you need to initialize some variables before you run a test, you use the setUp function and if you need to clean up variables you use tearDown function.
For the sake of simplicity, let’s create a small library called calculator, implement several basic functions add, sub, mul, div and test them using PIO Unit Testing engine.
- PlatformIO uses a unit testing framework called
Unity.Unityis not compatible with C library implemented in the framework. Let’s enable standard version of newlib C library inprj.conffile using the following config:CONFIG_NEWLIB_LIBC=y - Create a new folder
calculatorin thelibfolder and add two new filescalculator.handcalculator.cwith the following contents:calculator.h:#ifndef _CALCULATOR_H_ #define _CALCULATOR_H_ #ifdef __cplusplus extern “C” { #endif int add (int a, int b); int sub (int a, int b); int mul (int a, int b); int div (int a, int b); #ifdef __cplusplus } #endif #endif // _CALCULATOR_H_calculator.c:#include “calculator.h” int add(int a, int b) { return a + b; } int sub(int a, int b) { return a – b; } int mul(int a, int b) { return a * b; } - Create a new file
`test_calc.cto the foldertestand add basic tests forcalculatorlibrary:#include <calculator.h> #include <unity.h> void test_function_calculator_addition(void) { TEST_ASSERT_EQUAL(32, add(25, 7)); } void test_function_calculator_subtraction(void) { TEST_ASSERT_EQUAL(20, sub(23, 3)); } void test_function_calculator_multiplication(void) { TEST_ASSERT_EQUAL(50, mul(25, 2)); } void test_function_calculator_division(void) { TEST_ASSERT_EQUAL(32, div(100, 3)); } void main() { UNITY_BEGIN(); RUN_TEST(test_function_calculator_addition); RUN_TEST(test_function_calculator_subtraction); RUN_TEST(test_function_calculator_multiplication); RUN_TEST(test_function_calculator_division); UNITY_END(); } - Let’s run tests on the board and check the results. There should be a problem with
test_function_calculator_divisiontest: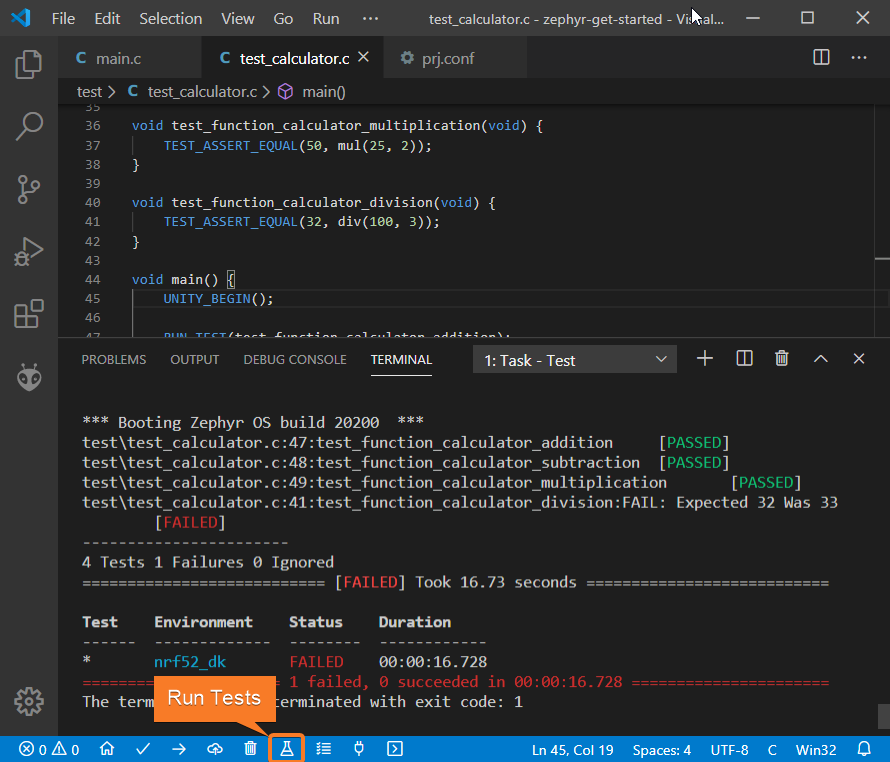
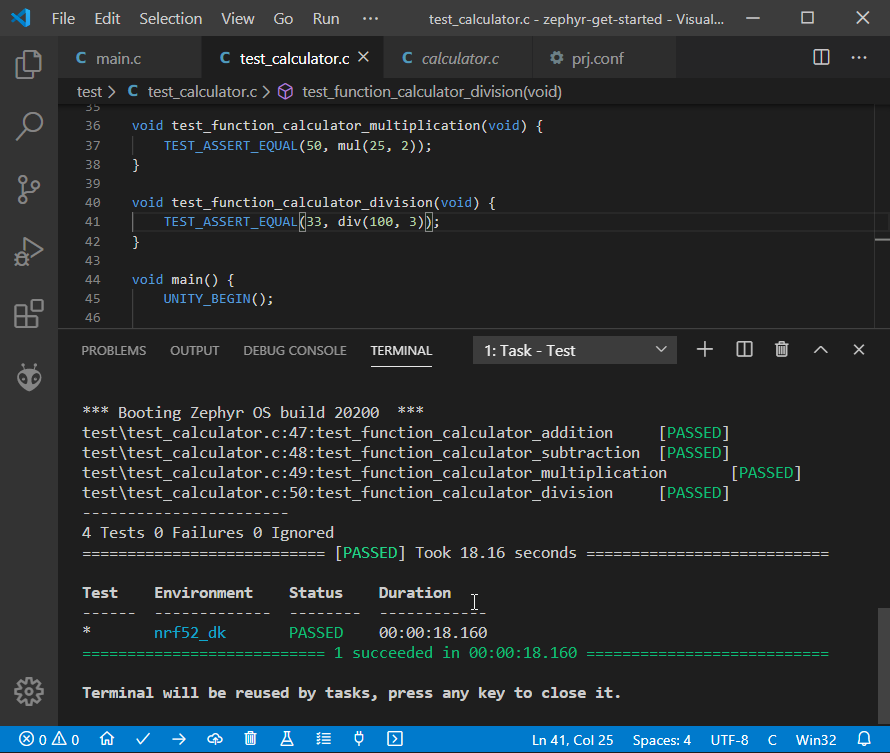
- Let’s fix the incorrect expected value, run tests again. After processing the results should be correct:
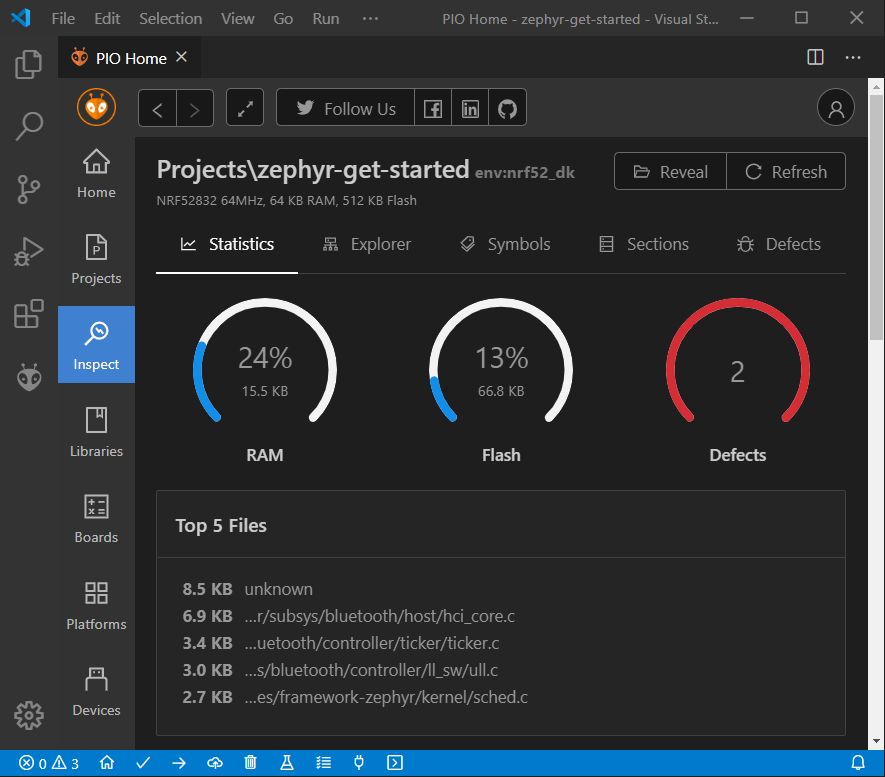
Project Inspection
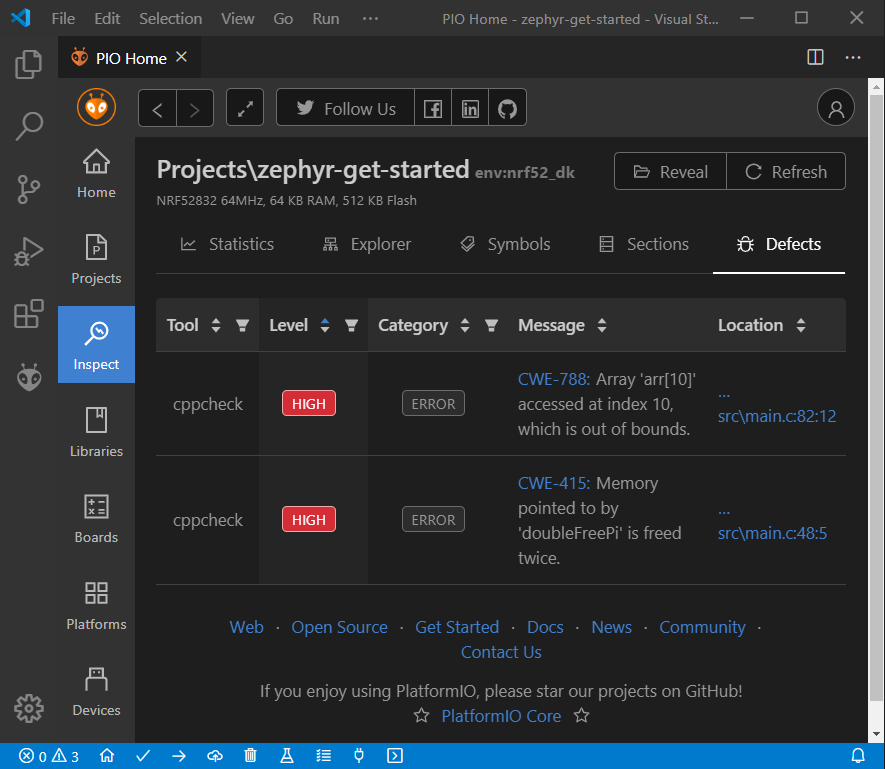
For illustrative purposes, let’s imagine we need to find a function with the biggest memory footprint. Also, let’s introduce a bug to our project so PIO Check can report it.
- Open
PlatformIO Homeand navigate toInspectsection, select the current project and pressInspectbutton: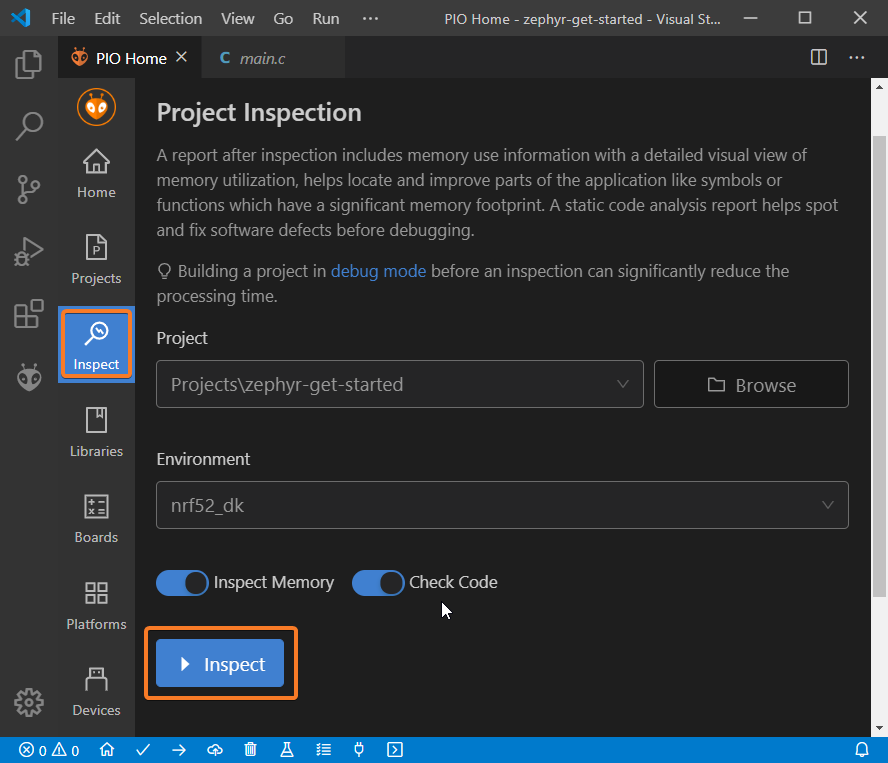
- Project statistics:
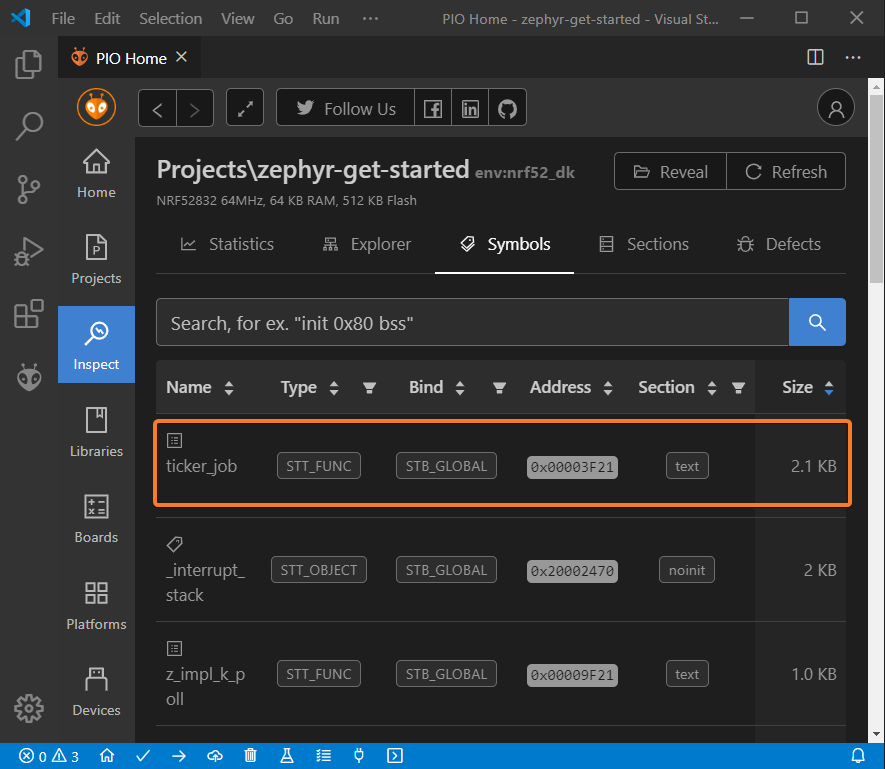
- The biggest function:
- Possible bugs:
Conclusion
Now we have a project template for Nordic Nordic nRF52-DK board that we can use as a boilerplate for the next projects.